
Yes! I finally sat down and made my sister's skirt, and documented all the steps to 1. have as a reference, and 2. to share with whomever is reading this :) I mentioned this photo in another post promising to post a little how-to, and here it is!
I hope the directions are clear and understandable! Of course, if you'd like to make the skirt and you're unsure of a step, just ask in a comment or send me an email and I'll be glad to answer any questions! and if you do use this, and post it in your blog or something, please link and credit me. Thank you.
SO!
Step 1 and 2. Cut your skirt and ties
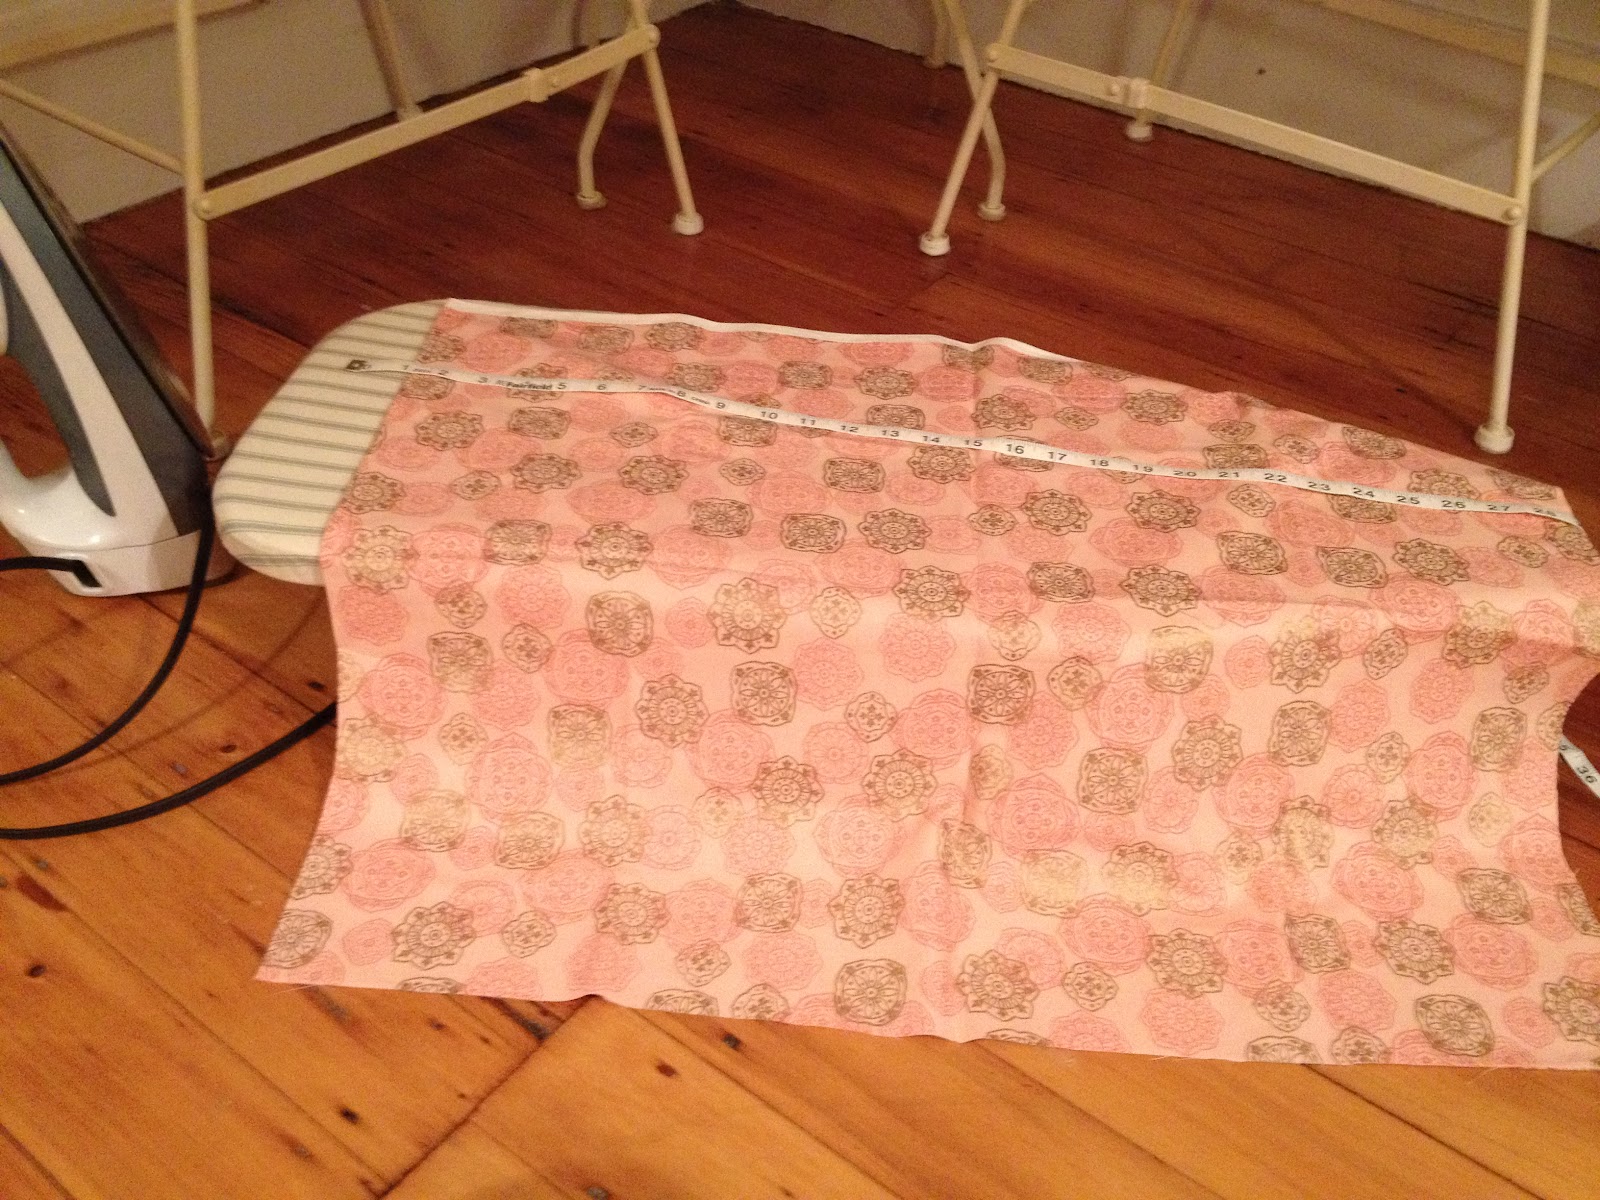

First, you're going to cut your fabric. The skirt part should be cut at 54" by 19". Next, you have to cut fabric for your two ties. The ties should be cut at 27" by 3".
Step 3. Make friends with the iron


**A tip for pinning : When you pin, always picture how the material is going to fed through your machine. The bulk of your material will always be on the left when going through the machine, so when you pin, hold the material how it will be sewn and put the pins in with the heads facing you. This way, the pins are easy to grab and remove as you sew your fabric.
Now you're going to iron and pin your straps. Begin by folding a side of the fabric halfway in towards the middle, then iron. Do to the same to the other side. Then you're going to fold the fabric in half again, then iron and pin to stay in place. You could turn off the iron, for now.
Step 4. Folding and pinning darts
This is probably the trickiest part of the whole skirt, but it's still pretty easy. The darts are what give this simple wrap skirt some shape.

First measure in 20" from the end of your skirt. Fold over a piece of fabric 3/4"

Pin where your dart is to start (the white pin head) then, you're going to measure down 5". At 5" down, you're going to pinch the fabric and pin it at the end. You're going to sew this on an angle, so at the end of the 5", you're just going to sew off the fabric (The dart is marked where it'll end by the red pin, but you would sew to the end of the pin, that's why it's angled. I post pictures of it sewn a couple of steps down if you're still confused!)


Now you're going to measure 2" over from the first dart. This time, your dart is only going to be 1/2" wide and 4" down.

Measure 3" across and do the same to the other side. The inside darts are 1/2" wide and 4" deep while the outside darts are 3/4" wide and 5" deep.
Step 5. Whip the iron back out


Now you're going to iron and pin all your hems. You're going to use the same method as folding an ironing the straps. Fold over the edge first to keep it in place, iron. Then fold over the edge again, and iron. Then pin. First, do the sides of the skirt, then the bottom, saving the top with the darts for last. After you have all your hems in place, you could put away your iron.


Both ironing and pinning really help me. Maybe because I'm a beginner, but whatever. It helps set the material that's to be sewn (this is extremely helpful for when you actually sew the darts) and I'm a visual learner, so I like to see how to piece is supposed to look, and it gives you the opportunity to notice if you're doing something wrong, rather than just fold over the edge and put it through the machine. But you should especially pin where the ends of your skirt meet (like the red pin in the corner of the second picture) to assure you keep all ends in place when you sew your skirt.
Step 6. Time to sew the darts

Since you ironed all your hems, everything should more or less stay in place. To sew your dart, take out the pin near the hem. (This picture was taken after I sewed my darts, but I thought it'd do more good as the first picture rather than last)


I edited the two bottom pictures just so you could see the thread easier. It's not the best, but trust me, it's better than how it was before. After you sew the dart, you could just tie off the thread and cut. Do this for the rest of your darts.

After you sew your darts, fold your hem back over.
Step 7. Sew the hem

Now you're going to sew first, the sides and second, the bottom of your skirt.
Step 8. Sew the ties

Time to sew the ties. Simply sew them along the side. BUT! Only finish ONE end of the ties. To finish, fold over one of the ends. Then sew the flap down to the inside. Make sure you when you sew, you reverse stitch a couple of times. Remember, you'll be pulling these ties to tie the skirt, so they'll be getting a lot of pull and use. You don't want them to rip.
Step 9. Attach ties to skirt


This is why you save the top of the skirt last to sew and why you only finish one end of the ties. Take out the pin securing the top hem to the side hem. Then unfold the side once. Place the unfinished end of your tie here, then fold over.

And sew in place! Again, remember to reverse stitch when you attach the ties.
You finished the skirt! Yay!!!!


